A new roof is one of the most significant investments you can make for your home. Whether you’re replacing an old, worn-out roof or installing one for a newly built home, understanding the residential roof installation process is essential. From selecting the right materials to budgeting and timelines, this guide will help you navigate the journey with confidence.
1. Why Residential Roof Installation Is So Important
Your roof is your home’s first line of defense against weather, pests, and other external threats. Beyond providing protection, a properly installed roof enhances curb appeal, improves energy efficiency, and increases your home’s value. For these reasons, residential roof installation requires careful planning and execution.
However, many homeowners feel overwhelmed by the number of decisions they need to make. What material should you choose? How much will it cost? What does the process involve? The answers to these questions will vary depending on your home’s needs and your preferences, but this guide will help simplify the decision-making process.
Step 1: Assess Your Roofing Needs
Before jumping into materials and costs, it’s crucial to assess your home’s specific roofing needs. This involves evaluating your home’s current roof condition, the surrounding environment, and your long-term goals.
i. Evaluate Your Roof’s Current State
If you’re replacing an old roof, start by identifying why it needs replacement. Are there leaks? Is there visible sagging, or have shingles begun to curl or fall off? These are clear signs your roof has reached the end of its lifespan. Even if the damage isn’t visible, older roofs often harbor hidden issues that can worsen over time.
ii. Understand Your Local Climate
Your region’s weather patterns play a significant role in your roof’s longevity. For instance:
- Areas with heavy snowfall. Require materials like metal or slate, which are durable and can handle heavy loads.
- Hot climates. Benefit from materials like tile, which reflects heat and helps regulate indoor temperatures.
- Wind-prone regions. Need impact-resistant shingles or standing seam metal roofs to withstand strong gusts.
iii. Consider Energy Efficiency
Many homeowners are prioritizing energy-efficient materials to reduce cooling and heating costs. Reflective materials and proper insulation during installation can save you money over time.
Step 2: Choose the Right Roofing Material
The material you choose for your residential roof installation affects not only its durability but also its aesthetic appeal, maintenance needs, and cost. Below, we dive deeper into the pros, cons, and ideal use cases for popular roofing materials.
i. Asphalt Shingles: Affordable and Reliable
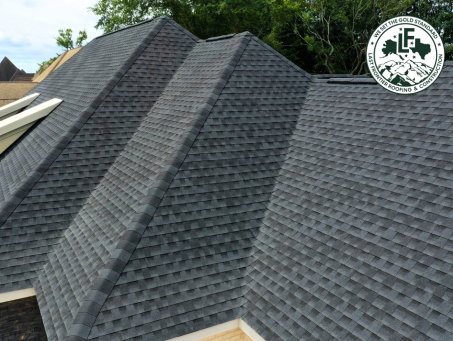
Asphalt shingles are by far the most common roofing material in the U.S. They’re affordable, versatile, and come in a variety of colors and styles. However, their shorter lifespan (15-30 years) makes them less appealing to homeowners seeking a long-term solution.
ii. Metal Roofing: Modern and Long-Lasting
Metal roofing is growing in popularity due to its exceptional durability (lasting 50+ years) and energy efficiency. It’s resistant to wind, fire, and insects, making it an ideal choice for extreme weather conditions. Additionally, metal roofs are eco-friendly, as many are made from recycled materials.
iii. Tile Roofing: Timeless Elegance
Clay and concrete tiles are known for their aesthetic appeal and durability. They’re fireproof, resistant to decay, and can last over 50 years. However, their weight requires additional structural support, and the upfront cost is significant.
iv. Wood Shingles and Shakes: Rustic Charm
Wood shingles offer natural beauty and decent insulation, while wood shakes provide a more rugged, textured look. Both require regular maintenance to prevent rot, mold, and pests and are not ideal for areas with high fire risk unless treated with fire-resistant coatings.
v. Slate Roofing: Unmatched Longevity
Slate stands out for its unmatched longevity, slate is among the most enduring roofing materials available, with the ability to last well over a century while maintaining its strength and elegance.e of the most resilient roofing materials on the market, renowned for its exceptional durability and a lifespan that can exceed 100 years. Its natural beauty is unmatched, but it’s also one of the most expensive and heaviest materials, requiring professional installation and reinforcement.
Step 3: Understand the Installation Process
A smooth residential roof installation involves several critical steps. Knowing what to expect will help you prepare your home and minimize disruptions during the process.
i. Initial Consultation and Inspection
The process begins with a consultation and detailed inspection conducted by an experienced roofing specialist. During this stage, they evaluate the roof’s existing condition, take precise measurements, and collaborate with you to review material options, establish a budget, and outline a project timeline.
ii. Removing the Old Roof
If you’re replacing an old roof, contractors will first remove the existing materials. This step can create debris and noise, so it’s essential to plan for temporary accommodations if necessary.
iii. Inspecting and Preparing the Roof Deck
The roof deck is inspected for damage or weak spots. Any rotting wood or structural issues are repaired or replaced to ensure the new roof has a solid foundation.
iv. Installing the Underlayment
Underlayment is an essential layer designed to offer enhanced protection by preventing water penetration into your home. Depending on your climate, you might opt for synthetic materials, which are more durable than traditional felt.
v. Flashing and Ventilation
Flashing is meticulously installed and securely fastened around critical roof features, such as chimneys, vents, skylights, and other penetrations, to create a durable, watertight barrier. This essential component helps channel water away from these vulnerable areas, effectively preventing leaks and ensuring long-term protection for your home.
vi. Installing the Roofing Material
This is where your chosen roofing material is installed, starting at the edges and working upwards. Proper alignment and sealing are essential for durability and weather resistance.
vii. Final Inspection and Cleanup
A thorough final inspection is conducted to verify that every aspect of the roof meets quality standards, ensuring durability, safety, and long-term performance. Cleanup involves removing debris, nails, and leftover materials from the property.
Step 4: Calculate Costs for Residential Roof Installation
Budgeting for a roof installation can be challenging, as costs vary based on several factors. On average, homeowners spend between $5,000 and $15,000, but high-end materials like slate can push costs upwards of $30,000. Key factors include:
- Material Choice. Asphalt shingles are the most cost-effective, while tile and slate are significantly more expensive.
- Roof Size and Pitch. Larger and steeper roofs require more materials and labor.
- Labor Costs: Expect to pay $3 to $7 per square foot for professional installation.
- Permits and Disposal Fees. Depending on your location, these can add a few hundred dollars.
Always get multiple quotes from contractors to compare pricing and ensure you’re getting value for your money.
Step 5: Establish a Realistic Timeline
Timelines for residential roof installation can vary based on the size of the roof, the complexity of the design, weather conditions, and the contractor’s efficiency. On average:
- Small or straightforward roofs may take 1-3 days.
- Larger or more complex roofs may take 3-7 days.
Weather delays are common, especially in regions prone to rain or snow, so keep this in mind when planning your project.
Step 6: Work with a Reputable Roofing Contractor
The success of your residential roof installation heavily depends on the expertise of your contractor. Here’s how to choose the right one:
- Check Credentials: Ensure they’re licensed, insured, and bonded.
- Read Reviews: Look for testimonials and ratings from previous clients.
- Ask About Warranties: A trustworthy contractor offers warranties on both materials and labor.
- Inspect Their Portfolio: Review examples of their past work to assess quality.
2. Tips for Prolonging Your Roof’s Lifespan
Once your new roof is installed, maintenance is key to ensuring it lasts as long as possible. Follow these best practices:
- Regular Inspections, Check for damaged or missing shingles, leaks, or other issues every six months.
- Clean Gutters. Blocked gutters can cause water to back up under the roof.
- Trim Nearby Trees. Overhanging branches can scratch or damage roofing materials.
- Address Issues Promptly. Fix minor problems immediately to prevent costly repairs later.
- Schedule Professional Maintenance. Periodic inspections by a contractor will catch hidden problems before they escalate.
3. Make Your Roof a Sound Investment
Residential roof installation is more than just a home improvement project; it’s an investment in your home’s safety, value, and aesthetic appeal. A well-installed roof does more than shield your home from the elements—it improves energy efficiency, boosts curb appeal, and can even enhance your property value. However, the process requires thoughtful planning, attention to detail, and, most importantly, collaboration with a trusted contractor.
From assessing your roofing needs to selecting materials and understanding costs, taking the time to educate yourself ensures you’ll make the right choices for your home. Keep in mind that your roof is a long-term commitment—one that will protect your family and belongings for decades to come. Proper installation, coupled with ongoing maintenance, guarantees you’ll get the most out of your investment.
4. Residential Roof Installation by Last Frontier: The Gold Standard
At The Last Frontier Roofing & Construction, we don’t just install roofs; we craft tailored solutions to meet your unique needs. As a veteran-owned company with over 40 years of experience, we take pride in delivering top-notch craftsmanship and exceptional customer service. Our 5-star systemized approach ensures every project is completed with precision, from start to finish.
Whether you aim to boost your home’s energy efficiency, elevate its visual appeal, or protect it from harsh weather conditions, our dedicated team will support you every step of the way to ensure your project’s success. We’re committed to helping you understand your options, providing transparent pricing, and delivering a roof that exceeds your expectations.
Don’t leave your home’s protection to chance. Reach out to The Last Frontier Roofing & Construction today for a free consultation. Together, we’ll build a roof that stands strong, looks stunning, and offers peace of mind for years to come.